नमस्ते दोस्तों! 👋
अगर आप Kling AI use करते हैं, तो आप जानते होंगे कि कभी-कभी AI Video में character अजीब तरह से move करता है। हाथ-पैर टूटे हुए लगते हैं, चेहरा बदल जाता है, या कैमरा अपने आप zoom करने लगता है। ये “Weird Movement” problem हर creator को परेशान करती है।
लेकिन अब एक नया और powerful solution आ गया है – Kling AI Motion Control!
ये feature Kling VIDEO 3.0 के साथ officially launch हुआ है और 2026 में Indian Creators के लिए गेम-चेंजर साबित हो रहा है।
जब मैंने पहली बार Motion Control try किया, तो मेरी कई वीडियो fail हुईं। लेकिन जब मैंने कुछ Secret Settings और Element Binding technique समझी, तो मेरे AI Video एकदम professional लगने लगे।
आज मैं आपको वही सब कुछ बताऊंगा – step-by-step, बिना किसी fluff के। चलिए शुरू करते हैं!

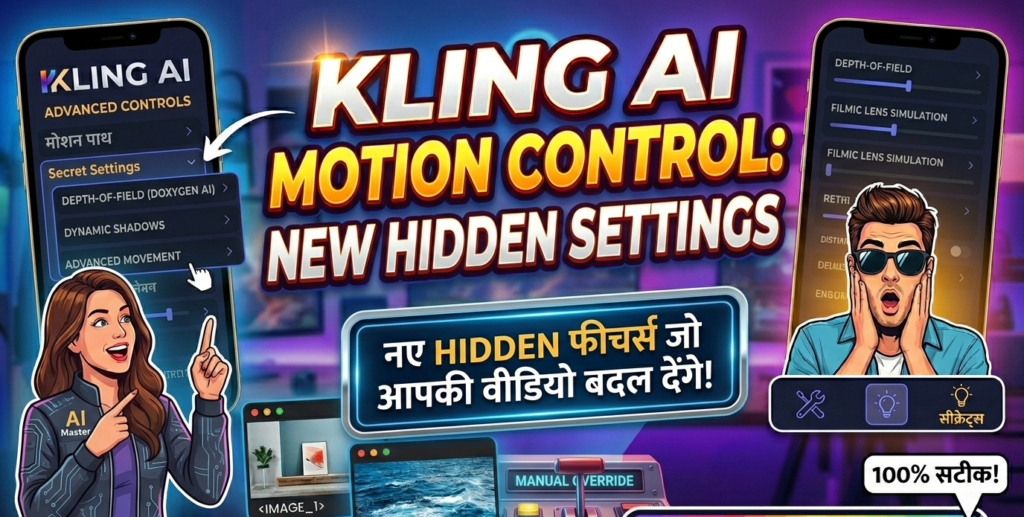
Table of Contents
Kling AI Motion Control क्या है?
Kling AI Motion Control एक advanced feature है जो आपके static image को reference video के हिसाब से animate करता है।
सरल शब्दों में:
- आप एक Reference Image upload करते हैं (आपका character)
- आप एक Reference Video upload करते हैं (जो motion आप चाहते हैं)
- Kling AI उस motion को आपके character पर apply कर देता है
ये Motion Transfer Technology पर काम करता है। यानी AI अपने आप कुछ नहीं बनाता – वो आपके reference video से exact movement copy करता है।
Kling VIDEO 3.0 के नए Features:
- Consistent Facial Identity: किसी भी angle पर चेहरा same रहता है
- Element Binding: Face consistency के लिए special feature जो 3.0 में आया है
- Complex Emotion Reproduction: हंसी, गुस्सा, हैरानी – सब expression smoothly transfer होते हैं
- 30 Seconds One-Shot Action: लंबे और continuous actions के लिए support
- Precise Hand & Face Control: हाथों और चेहरे के movements अब ज्यादा accurate हैं
💡 Personal Experience: जब मैंने Kling 2.6 use किया था, तो 45° से ज्यादा घूमने पर face distort हो जाता था। लेकिन Kling 3.0 Motion Control में Element Binding feature ने ये problem पूरी तरह fix कर दी है – अब 360° rotation में भी face consistent रहता है।
Motion Control vs Motion Poster: असली अंतर
बहुत से लोग Motion Control और Motion Poster को एक ही समझ लेते हैं। लेकिन दोनों में बड़ा अंतर है:
| Feature | Motion Control | Motion Poster |
|---|---|---|
| Input | Reference Video + Character Image | Single Image + Text Prompt |
| Control Level | Frame-by-frame precise motion | General motion direction |
| Use Case | Dance, sports, complex actions | Social media posts, looping banners |
| Result Predictability | High (exact motion copy) | Medium (AI interprets) |
| Best For | Professional content, storytelling | Quick content, subtle animations |
Motion Poster में आप सिर्फ एक finished image देते हैं और AI उसमें subtle movement add करता है – जैसे slow push-in camera, faint particles, या gentle glow।
Motion Control में आप exact video reference देते हैं – तो जो motion आप चाहते हैं, वही मिलता है।
🎯 Pro Tip: अगर आपको exact dance step या action चाहिए, तो Motion Control use करें। अगर सिर्फ “थोड़ा movement” चाहिए poster के लिए, तो Motion Poster काफी है।
Step-by-Step Guide: Kling AI Motion Control कैसे use करें
चलिए अब practical part पर आते हैं। ये steps Kling AI Web और App दोनों पर काम करेंगे:
Step 1: Account Setup
- Kling AI Official Website पर जाएं
- Login या Sign Up करें
- Motion Control section में जाएं
Step 2: Reference Materials तैयार करें
Reference Video के लिए Guidelines:
- Duration: 3-30 seconds (ideal: 5-10 seconds)
- Resolution: कम से कम 720p, short edge 340px+, long edge 3850px तक
- Content: Single character, clear motion, good lighting
- Format: MP4 या MOV
- Important: Video में cuts, shot changes, या camera movements avoid करें
Reference Image के लिए Guidelines:
- Character clearly visible हो, पूरा शरीर या आधा शरीर जैसा motion reference में है
- JPG या PNG format
- Short edge कम से कम 340px
- Face और body proportions motion reference के साथ match करें
Step 3: Upload Process
- Motion Reference section में अपना reference video upload करें
- Character Image section में अपनी static image upload करें
- Element Binding option enable करें (face consistency के लिए)
⚠️ Element Binding Note: ये feature सिर्फ तब काम करता है जब “Character Orientation Matches Video” selected हो।
Step 4: Character Orientation Select करें
दो options मिलेंगे:
| Option | कब use करें |
|---|---|
| “Character Orientation Matches Video” | जब आप चाहते हैं कि character का angle reference video जैसा हो |
| “Character Orientation Matches Image” | जब आप character को अपनी image के angle में रखना चाहते हैं + camera movement (zoom, pan) add करना चाहते हैं |
💡 Camera Movement Tip: अगर आप Zoom In, Zoom Out, Camera Up/Down जैसे effects चाहते हैं, तो “Matches Image” option select करें।
Step 5: Prompt लिखें (Optional but Powerful)
Background, lighting, atmosphere control करने के लिए prompt use करें:
12
Negative Prompt भी add करें weird movements रोकने के लिए:
1
Step 6: Quality Mode Select करें
Kling VIDEO 3.0 Pricing:
| Mode | Credit Usage | Best For |
|---|---|---|
| Standard Mode | 9 Credits/second | Simple animations, testing, social content |
| Professional Mode | 12 Credits/second | Complex choreography, professional outputs, facial consistency |
💰 Pricing Tip: पहले low-resolution test run करें (Standard Mode), फिर final render करें (Professional Mode)। इससे credits बचते हैं।
Step 7: Generate & Download
- Generate button click करें
- Processing complete होने का wait करें (2-5 minutes)
- Preview देखें, अगर ठीक है तो Download करें
- Format: MP4, watermark-free (paid plans पर)
Pro Tips: Experts की तरह काम करें
ये वो secrets हैं जो मैंने अपने 50+ tests के बाद सीखे हैं:
Tip #1: Element Library के लिए सही Facial References Upload करें
Motion Control Element Library सिर्फ facial information use करता है – clothing, hairstyle, makeup नहीं।
Best Results के लिए:
- Head Turn के लिए: Front view + side views (left/right) upload करें
- Facial Expression के लिए: Neutral front + smiling front upload करें
- 360° Rotation के लिए: Front smile, left-profile smile, right-profile smile, upward, downward – सब upload करें
Tip #2: Reference Video Quality Matters
- Good lighting = Better motion tracking
- Stable camera = Cleaner output
- Single subject = No confusion
- Moderate speed motion = Best results (too fast = artifacts)
🎬 Real Example: मैंने एक dance video के लिए 3 अलग-अलग reference videos try किए। जो सबसे clear, stable, और moderate speed का था, उससे best result मिला।
Tip #3: Prompt में Constraints Add करें
Motion Control में prompt का काम motion नहीं, बल्कि look और stability control करना है।
123456
Tip #4: Short Duration = Better Control
पहले 4-6 seconds के वीडियो बनाएं। Long videos में motion drift का chance ज्यादा होता है।
Tip #5: Test Small, Iterate Smart
- Low-res test run करें
- One variable change करें (prompt, orientation, binding)
- Seed value note करें (consistency के लिए)
- Final render करें
Weird Movement Problem को कैसे ठीक करें
आपके AI Video में ये common problems आ सकती हैं – और इनके solutions भी:
Problem: Face Morphing / Distortion
Solution:
- Element Binding enable करें (Kling 3.0 में)
- Multiple angle face images upload करें (front, side, smile)
- Reference video में face clearly visible हो
- Complex expressions के लिए video reference use करें (richer facial data)
Problem: Hands/Fingers Look Weird
Solution:
- Reference video में hands clearly visible हों
- Prompt में add करें: “natural hand movements, detailed fingers”
- Motion strength 60-80% रखें, 100% नहीं
- Pro Model use करें for intricate hand movements
Problem: Camera Drift / Unwanted Zoom
Solution:
- Prompt की first line में: “fixed camera, no zoom, no pan”
- Negative prompt में: “no camera shake, no dolly”
- Duration कम रखें (4-6 seconds)
- Single camera move only use करें
Problem: Character Slides / Floats
Solution:
- Surface detail add करें prompt में: “rough floor, visible texture”
- Motion verbs के साथ speed words use करें: “walks steadily”, “glides gently”
- Reference video में character ground पर हो
Problem: Background Flickering / Text Shimmer
Solution:
- Background simple रखें: “plain backdrop”, “static environment”
- Tiny typography + aggressive motion avoid करें
- Parallax strength reduce करें
- Duration shorten करें
🔧 Troubleshooting Flow:
- Low-res test run करें → 2. One variable change करें → 3. Seed lock करें → 4. Final render
FAQ: अक्सर पूछे जाने वाले सवाल
Q1: Kling AI Motion Control free है क्या?
Ans: हाँ, basic version free credits के साथ available है। लेकिन Professional Mode, watermark-free download, और longer videos के लिए paid plan चाहिए।
Q2: Reference video की maximum length कितनी हो सकती है?
Ans: 3-30 seconds। Ideal range: 5-10 seconds for best control और stable results.
Q3: क्या मैं अपनी आवाज़ (audio) keep कर सकता हूँ?
Ans: Kling Motion Control मुख्य रूप से visual motion पर focus करता है। Audio retention के लिए अलग settings check करें, लेकिन automatic lip-sync अभी limited है।
Q4: Motion Control और Text-to-Video में क्या फर्क है?
Ans: Text-to-Video में AI अपने हिसाब से motion बनाता है। Motion Control में आप exact motion reference देते हैं – तो result predictable और directorial control के साथ होता है।
Q5: Indian creators के लिए Kling AI suitable है?
Ans: बिल्कुल! Kling 3.0 global launch के बाद Indian creators भी इसका पूरा फायदा उठा सकते हैं। हिंदी prompts भी work करते हैं, लेकिन English technical terms better results देते हैं।
Q6: Failed generation के credits वापस मिलते हैं?
Ans: नहीं, अगर model ने 3 seconds से ज्यादा usable motion extract कर लिया, तो credits refund नहीं होते। इसलिए पहले test runs करें और action complexity/speed adjust करें।
Q7: Element Binding कब use करना चाहिए?
Ans: जब आपको facial consistency चाहिए – especially complex motions, multi-angle rotations, या emotional transitions के दौरान। ये feature सिर्फ “Character Orientation Matches Video” mode में काम करता है।
Conclusion: अब आपकी बारी
दोस्तों, Kling AI Motion Control सिर्फ एक feature नहीं – ये आपके AI Video workflow को completely transform कर सकता है।
✨ Key Takeaways:
- Motion Control = Exact motion transfer, Motion Poster = Subtle looping animation
- Element Binding (3.0) = Facial consistency का secret weapon
- Reference quality > Prompt complexity
- Camera settings first, motion details later
- Test small, iterate smart, lock seeds
Kling 3.0 के साथ, creators के पास अब वो tools हैं जो पहले सिर्फ professional studios के पास होते थे। बस जरूरत है सही technique की – और वो अब आपके पास है।
Your Action Plan:
- आज ही Kling AI पर account बनाएं
- एक simple reference video + image के साथ Standard Mode में test करें
- ऊपर दिए गए Element Binding और Pro Tips follow करें
- अपना first professional AI Motion Control Video create करें
💬 Comment करें: आपका पहला Kling AI Motion Control experience कैसा रहा? कोई problem आई तो मैं help करूंगा!
अगर ये पोस्ट लगी, तो Share करें और Bookmark कर लें – क्योंकि AI Video की दुनिया तेजी से बदल रही है, और आप हमेशा updated रहना चाहेंगे।